Drilled short osteotomy: recommendations?
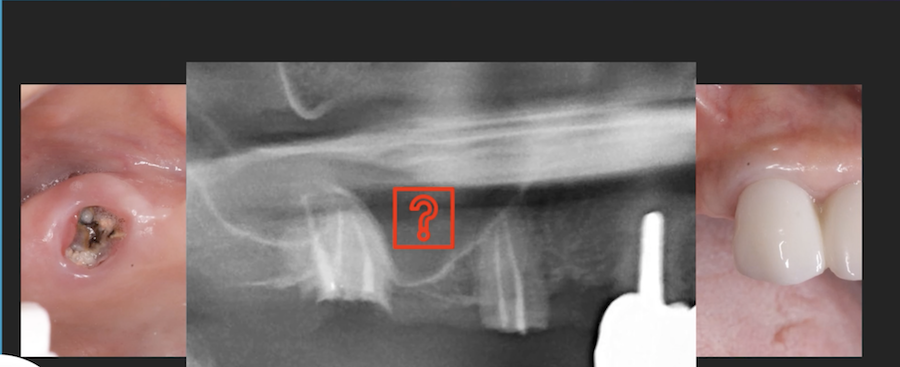
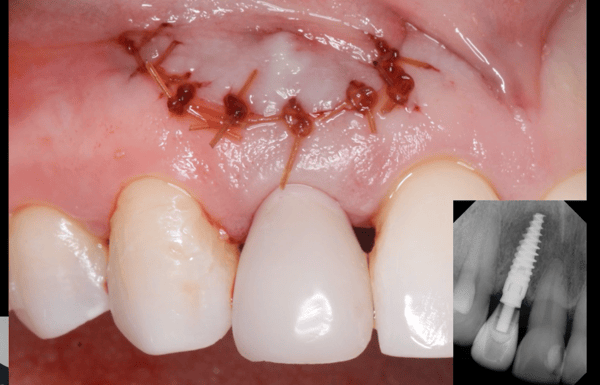
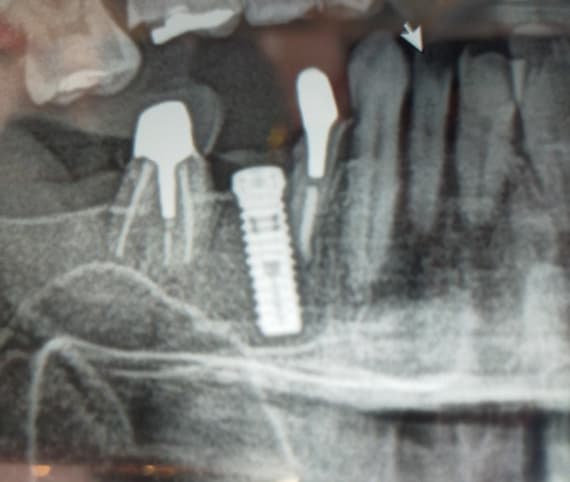
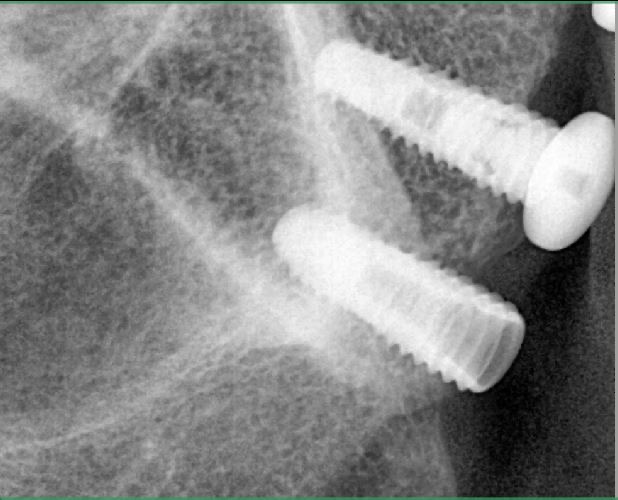
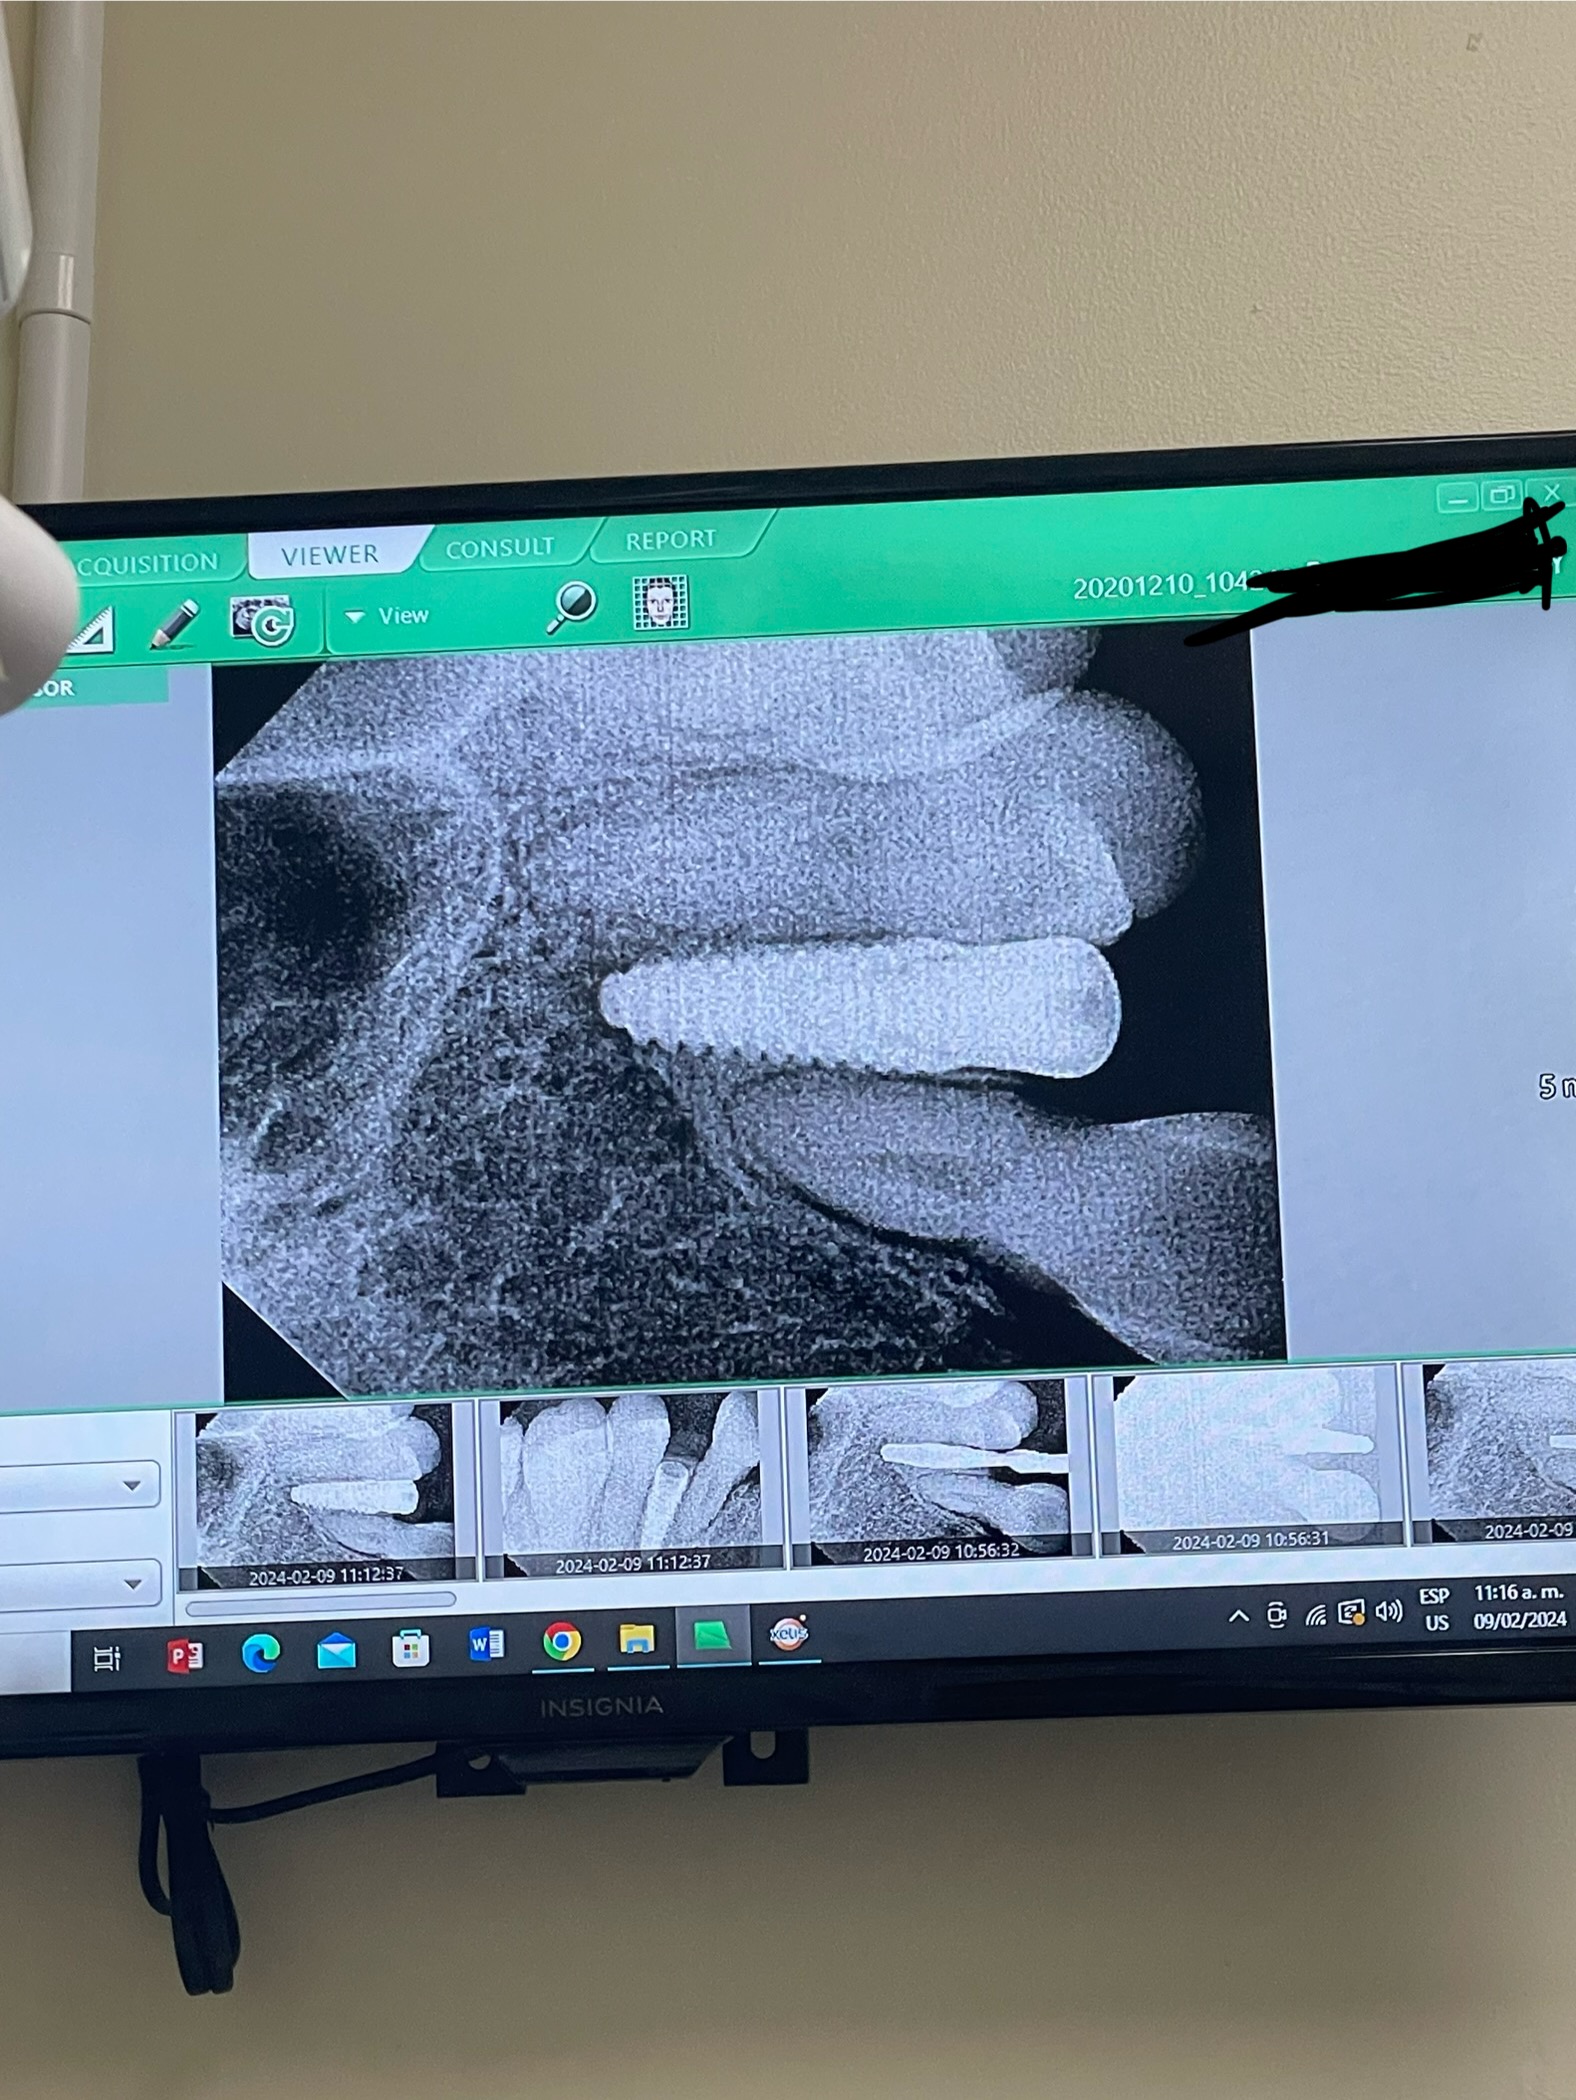
I installed my first dental implant in the mandibular anterior area. My drill jammed while I was drilling the osteotomy and I did not drill to the desired depth. I knew it was short. I torqued the implant down and the collar is exposed. The buccal cortical plate also was fractured. The implant is a 4x15mm 3i tapered, internal connection. Should I remove the implant and try to drill a deeper osteotomy and then reinsert the implant? What do you recommend that I do?
14 Comments on Drilled short osteotomy: recommendations?
New comments are currently closed for this post.
peterFairbairn
1/25/2016
Yes do it now 15 mm nice and long but maybe not needed so just use a shorter one , and graft the buccal are as fracture of a thin plate means loss. And attached keratinised tissue can be an issue in this area ...... with bone loss and threads exposed ..... may be more trouble
Peter
EK Oral Max
1/26/2016
Very large implant , what was the goal of the placement?
Dr K Gilani DDS, MOM
1/26/2016
Dear Colleague,
Take a post OP OPG with metal balls. Do proper measurements. Take implant out. Plane the receiving site, if applicable.for best finishing result. Place a reasonable length implant. Do grafting, if applicable.
Drill won't jam, if you observe the drilling protocol, Especially for hard compacta in mandible you need to change lots of drills, so you won't get jamming or fractures.
Note that lingual ridge is longer than buccal in edentulous mandible, so what you see as top edge in the OPG is the lingual ridge border. Beware of ending the neck of implant below the floor of the mouth.
Good luck
Franco
1/26/2016
Hard bone in this area. If you follow the sequence of drills , there should be no jam. If it is hard bone , you may need to use threading drills following osteomyelitis in order to reduce the wedging pressure in the bone and hence easier implant placement, less ischemic pressure on bone and less postoperative pain. Good luck
Dennis Flanagan DDS MSc
1/26/2016
The implant is too wide and too long for the anterior mandible. Please present osseous ridge dimensions and radiographs. Most often a mini implant will do nicely. Remember it is important to leave at least 1.8mm of facial cortex for adequate blood supply for remodeling which will occur during the life of the fixture. You should remove it and try again with a mini. I assume this is a partially edentulous patient. You should be able to recover the case. I hope you have taken an AAID MaxiCourse. You can do it!!! Dennis Flanagan DDS MSc
Richard Hughes, DDS, FAAI
1/26/2016
Remove the implant STAT. You most likely did not need an implant that long. Replace with a shorter implant and graft the newly formed defect. The other doctors gave you excellent feedback.
Did the osteotomy bleed. No blood ......no bone
Spencer
1/26/2016
When you want clinical help, you need to provide more info so others can get a feel for the situation...you didn't provide much. Help us to help you. (You asked for help, but as of when I am posting this you haven't bothered to come back and participate in this... What's with that?)
Did the drill "jam" or did it torque out? 15mm length is kind of long...more often than not, reserved for where you feel the need for extra length (eg. soft bone) as opposed to wherever you happen to have the length available. And I'm not so sure you had the length available...you may have bottomed out on the cortical bone on the inferior surface of the mandible.
If the osteotomy is short, you should have simply substituted a shorter implant, making sure to insert to the depth you want (rather than inserting until it bottoms out). At any rate, you don't want an implant sitting too high...so it ought to be removed ASAP and dealt with.
Buccal cortical plate possibly fractured because 4mm is on the wide side for the anterior mandible.
Reg O'Neill
1/27/2016
Well done for posting your case but do give the forum more details incl. radiographs. This is your first implant and as our friends have addressed it flags up issues with both planning and placement that are addressed in structured postgrad courses. This is not looking like a good placement so remove the implant and let it heal. Do get a mentor to assist in your first cases and help with planning or you run the real risk of failures/expense and unhappy patients which can cause even more stress. You need to be prepared for all scenarios/complications and good training and planning helps a lot, so do share your initial plans with more experienced colleaques and good luck with the learning curve.
ZORAN STAJCIC
1/27/2016
I agree absolutely with other colleagues that this implant should be removed that will require some additional procedures afterwards. Explantation may be tricky one in your case due to the implant length and the mandibular dense bone. I have published quite recently an article on the removal of dental implants. This may help you should simple unwinding is not working.
Int J Oral Maxillofac Surg. 2015 Dec 10. pii: S0901-5027(15)01416-2. doi: 10.1016/j.ijom.2015.11.003. [Epub ahead of print]
Removal of dental implants: review of five different techniques.
StajÄić Z1, StojÄev StajÄić LJ2, Kalanović M2, Äinić A2, Divekar N3, Rodić M3.
Author information
Abstract
The aims of this study were to review five different explantation techniques for the removal of failing implants and to propose a practical clinical protocol. During a 10-year period, 95 implants were explanted from 81 patients. Explantation techniques used were the bur-forceps (BF), neo bur-elevator-forceps (ηBEF), trephine drill (TD), high torque wrench (HTW), and scalpel-forceps (SF) techniques. The following parameters were analyzed: indications for explanation, site of implantation, and the type, diameter, and length of the implant removed. The most frequent indications for implant removal were peri-implantitis (n=37) and crestal bone loss (n=48). The posterior maxilla was the most frequent site of implant removal (n=48). The longer implants were more frequently removed (n=78). The majority of implants were removed after 1 year in function (n=69). The BF/ηBEF and SF techniques were found to be the most efficient. Explantation techniques appeared to be successful for the removal of failing implants. The BF/ηBEF and SF techniques demonstrated 100% success. The ηBEF technique enabled safe insertion of a new implant in the same explantation site. The HTW technique appeared to be the most elegant technique with the highest predictability for insertion of another implant. An explantation protocol is proposed.
Copyright © 2015 International Association of Oral and Maxillofacial Surgeons. Published by Elsevier Ltd. All rights reserved.
KEYWORDS:
dental implant complications; dental implant explantation; dental implant failure; peri-implantitis
Best of luck
Professor Zoran Stajcic
Carlos Boudet, DDS DICOI
1/27/2016
Welcome to our community of oral implantologists, and to the decisions that you will face every time you pick up those drills.
The decision is clear here.
As Richard and Peter have said, the time to reassess and adapt to the situation is when you are placing it, but you still have time.
You do not want your first implant to give you a bad outcome, and very likely the implant will heal with bone loss and the top of the implant will expose.
Remove the implant and place a shorter one, placing it about a millimeter subcrestal.
Make sure the bucal plate is thick enough. If it is not, place some particulate bone and membrane to make surethat you won't loose the bone on the bucal by removing the blood supply to the thin bone plate.
You probably did not need such a long implant to begin with.
Good luck, and thanks for posting!
simonne patrick
1/27/2016
Dear Colleagues,
Thank you for all.
Rabih abou assi
1/28/2016
I think the whole concept is wrong a 4 x13 mm in this region and the issue of miss drilling its a problem so dearcollegue. I suggest to have additional training and knowledge and to. Read more before i suggest as a start contemperary in implantology by carl mesh
Ths
Bruce
2/2/2016
Regardless of what might be the proper implant or not in this area can be argued for quite some time. The take away point here is the lack of preparation. Always be prepared for potential disasters or failures. Have a back up drill, drill console and back up drills and have a back up power source just in case the power goes down. Have devices and/or tools available to retrieve broken implants, repair damaged bone, etc. Keep count of drill use and replace following manufacturer's recommendations and even soon if several cases are type I bone.
Know your torque tolerances of your implants, tools and parts. All sizes will fracture or fail at certain torques as well as their associated devices. Some implants can fracture or strip with what most clinicians find to be "normal" insertion torques.
Be a Boy Scout and BE PREPARED.
Faisal Moeen
2/2/2016
Bruce; Loved your comment.
On another note, give the guy a break.
Like we all started with brilliant placements from the word go?!
Simonne thanks for posting, we all learn from our mistakes and your forthcoming implant placements would be better if you know what goes wrong when and where. Keep reading, keep asking and keep placing with the want to achieving near perfection.
If the implant site isn't hurting, no signs of infection,,,,would you not be okay in considering NOT to disturb the healing cascade which now seems uneventful??
Id say let the metal be in there as long as its restorable. If you cant fore see a reasonable restoration, then you'd be better off removing it now before it glues with the bone which it will. With a 15mm insert, im sure you've left in a good 13mm?
You haven't given us the necessary information, hence I cant predict bone loss and no one can predict the speed at which its gonna vanish in the future.