Zest locator attachment overdenture: cause of food impaction?
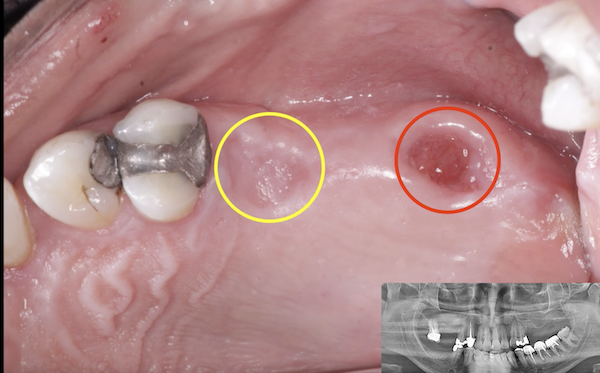
I inserted an implant retained overdenture using two Zest Locator attachments. The overdenture occlusion is stable. I picked up the two Locators chairside. The patient is complaining that she gets food underneath the overdenture every time she eats. Could the Locator abutments be too tall? I used the deepest area of the gingiva to select the Locator abutment height. What can I do to eliminate this problem?
9 Comments on Zest locator attachment overdenture: cause of food impaction?
New comments are currently closed for this post.
joe
2/10/2015
YES
Mark Montana
2/10/2015
Did you vent the sites prior to picking up the attachments? Very important otherwise hydraulic pressure may prevent proper seating of the denture. Also, if this was a new denture, it is often favorable to allow the patient to wear the denture prior to placing the attachments, even for one day to allow it to settle into place. Last thought, if you did these suggestions, the borders may be inadequate.
From a patient management point, food will get under a two-implant O.D. depending on the residual ridge and movable tissue. The lingual tissues move in function and will open pathways for food entrapment. In a free-floating denture, the food may escape but not with a retained denture.
Vipul G Shukla
2/10/2015
The ideal implant supported overdenture derives tissue support and uses the Zest Locator abutment assembly to stay in place and not move. Yes, you may have chosen abutments too high for the case, happens to the best of us.
Also, during the pick up impression, do not force the patient to bite too hard into the abutments, or they spring back up after the final processing.
If changing abutments alone does not work, do a pick up impression again and this time, ask the lab to do a processed reline as well. All the time, use patient's Centric occlusion to record it and not holding by your fingers.
Good Luck!
Jeff
2/10/2015
Unless the denture is literally fixed to the tissues you'll stand a chance at getting something under the denture. If the abutments are not aligning, I find that by removing the attachments from the denture, use high viscosity VPS, with a lingual port in the denture (#8 round burr), inject a "small" amount of material in the intaglio surface of the denture... Only in the areas that the attachments were. Seat CD as if relining in patient mouth. This will lesson the chance of increasing any vertical with relining the whole CD, which in turn will throw the thing out of wack (technical term). Send to the lab with analogs, or place the analogs yourself, pour stone matrix, remove CD, clean up impression area and place new attachments, seat CD on matrix and either cold cure or light cure in place. Slam dunk every time.
Tuss
2/11/2015
Is it an upper or lower denture?
Is food packing between the locator abutments or the free-end saddle area?
Your method of abutment selection is correct as you use the deepest area of gingiva to make sure the abutment is 1mm above that point (so it may be +2mm in other points on the same abutment).
I would keep with the same abutments you have and carry out another intra oral wash denture reline is the same manner you were shown to do a dental school when making an "altered" or "corrected" cast impression - ie add the cold cure acrylic to the denture base, seat the denture so the locators are fully engaged then just leave it alone (take out the opposing denture and have the patient sit with a relaxed, closed mouth). If you are getting food under saddle areas distant to the locators then this will always happen as the denture will rotate about the locators - this is he commonest complaist from new locator patients as before the denture was stable they could sweep tongue under it and not notice food impaction. It sounds like you have done everything right .
TK
2/12/2015
The premise that the described complication could be the result of incorrect abutment height is incorrect and demonstrates a fundamental lack of understanding of the system. It does not matter how deep into the base the abutment goes as long as the denture is seated fully when the housings are picked up. If you were next to me, we would draw a picture showing the cut away view of the gingiva, the abutment and the housing in the denture base. Then we would erase the housing, and draw a taller abutment without moving the denture base.
The key (when picking up chairside) is to ensure that nothing impedes contact between the intaglio surface and the gingiva. A common error is preparing inadequate space in the denture base to accommodate the Locator components. The process is to place a white washer (or two or three if the abutment is taller than necessary) and the housing with a black processing insert. You then prepare a space and a vent hole and ensure that there is no contact between the denture base and the Locator housing. This could be confirmed by seating the denture quickly and listening for contact. It could also be confirmed by placing a small amount of rope wax (or Fit Checker or Blue Mousse) into the hole, seating the denture and then checking for contact when removed. If the denture contacts the housing, you will end up with a denture on stilts that invites food impaction.
A second complication can arise when a patient is asked to "bite gently while this sets". I believe this has been the source of most of my failures. I now hold the single denture in place personally while the material sets. Complications arise if the occlusion is other than perfect. For example, if the bite is heavier in the posterior, then the anterior portion of the denture base will tend to lift up when the patient closes into centric. That space will remain when the material sets. A similar situation would exist if one side contacts before the other, or if a patient dozes and opens to resting occlusion and tongue thrusts, or if they are concentrating particularly hard on my anecdote and bite harder on one side... I have decided that I have nothing better to do during that time, so I hold the denture (only one at a time) personally. I equilibrate the occlusion after picking up the housings.
After picking up the housings, I check the flash material to ensure the denture was seated fully. The pickup acrylic should be continuous with the intaglio surface of the denture base. If it extends deeper than the intaglio surface, then I know that the denture could not have been properly seated.
Another area of concern is inadequate extension the denture flanges. I did a case for a lab worker. He wanted to pickup the housings himself, so at three months we took a hard reline impression that picked up the 4 impression housings. He used a round bur to modify the plaster around the borders of the flanges to create a seal (similar to how metal frameworks are made). The technique is interesting, but I have no way to quantify the effectiveness.
It is often advantageous to select the shortest abutment possible. Two reasons are:
1) Low profile abutments cause less irritation to the patient's tongue when the denture is out.
2)The denture is weakened when additional acrylic is removed to accommodate tall abutments
For those reason, we try to select the shortest abutment possible. However, the selection height will not alter the final fit if the housings are picked up correctly.
Sorry, my response was too long. I have made enough mistakes for all of us. And these remakes aren't cheap.
EC
2/13/2015
Any feedback with using several mini- implants supporting an overdenture ( OD) in lower? A colleague is planing to use several mini- implants to support an overdenture denture in lower from 36 to 46. What r the long term results? I usually do 2-4 implants with locators with OD but my colleague plans to use mini- implants because the case requires bone grafting for normal size implants.
TonyZ
2/16/2015
Try the LODI implant from ZEST Anchors. It is a 2.4 or 2.9 mm implant body with a separate Locator abutment and all the chairside processing components in one package.
As long as the attachments are properly maintained and the resilient component replaced when needed, some mini/narrow implant articles have demonstrated success rates in the mid 90's
Tuss
2/14/2015
They started out in life as provisional implants to secure a denture while the larger implants integrated and thanks to some fancy legal challenges they got classed as definitive implants. i have seen several cases (as a prostho) wherer multiple mini implants have sheared in half. The ine between what is or is not a "mini" implant has become blurred. If you need to use them for overdentures then ICX have 2.9mm diameter transmucosal implant (2 piece with ball abutment you torque down as opposed to the one-piece implants) thats great. I would try to stay away from 1 piece implants because of the abutment wears then you have a big problem.

