Broken Screw: any suggestions?
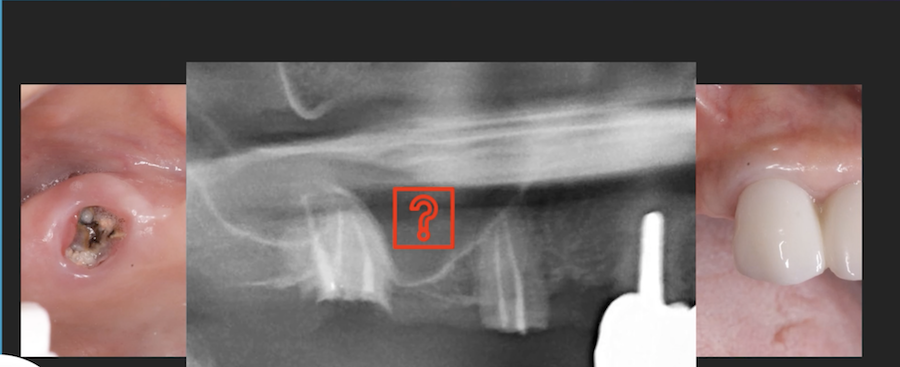
I have a problem with a broken screw in a 3i Implant. The remaining screw fragment is not loose and I have tried Ultrasonic Tartar and Stain Removal solution soak in the implant for lubrication. I have used a temporary plastic tube coping in the implant to guide a modified latch grip slow speed round burr in reverse to try to back out the piece with no success to this point. Does anyone have any suggestions for me to try? I have seen a couple of kits for purchase that seem to have a similar scenario to my round bur with tube. Any help would be greatly appreciated.

37 Comments on Broken Screw: any suggestions?
New comments are currently closed for this post.
Peter Hunt
11/21/2018
Yes, use an ultrasonic instrument with a very fine tip. Touch the tip down on the broken screw. This will often vibrate and rotate the fractured portion out.
alvaro ordonez
11/21/2018
The way I see it, you got very bad luck in this fracture, as the piece is seated all the way down which means there may be torque in the fragment, unlike other fractures where the piece its more coronal. What works most of the time is the handpiece in reverse and you already tried that.
1. Let the patient know the implant may need to be removed, he needs to be in agreement with you in that so you don't look like the guy that damaged his fine implant.
2. With a lot of patience, modify a small hardware screw driver in such a way that it fits all the way down, you may need to bend it a little bit.
3. with even more patience and extreme care try to create a dimple (line) in the remaining part of the screw, then with the screw driver you will have real chances to unscrew it out.
This has worked for me several times.
Good Luck
Alvaro
Sean Rayment
11/21/2018
I second Peter's suggestion. The fine tip ultrasonic instrument has worked for me in the past. Patience and good luck!
Dr. Gerald Rudick
11/21/2018
You have two good suggestions here....either by using a very fine ultrasonic tipe of a piezo instruments, or using the tiniest round bur that operates in a reverse cutting mode, you should be able to loosen the broken fragment, and keep massaging with am emdodonticexplorer in a reverse direction.....it usually comes out....good luck.... you could also place a tiny drop of DW40 oil on the explorer, to lubricate the screw....
Dennis Flanagan DDS MSc
11/21/2018
Use a festooned #557 slow speed burr in reverse to remove the fragment. As it approached the platform use a 33 1/2 in clockwise (normal rotation) to turn it out.
J Oral Implantology- ManagementFracturedAbutmentScrew 2016 Dec 42(6): 508-511
Howard Abrahams
11/21/2018
You may want to send it to your local endodontist with a microscope to help out. Or, because screw is broken far down, you can use a shorter abutment screw which may still allow you to seat and engage the implant fully. Sometimes screws from compatible systems aren't quite as long as the screws from the implant manufacturer. You have to let the patient know, obviously, what you are doing. Last resort is a cast post and core into the implant - not ideal but better than extracting the implant. Good luck.
Carlos Boudet, DDS DICOI
11/21/2018
The comments from Dr. Ordonez are right on. The broken fragment has bottomed out and that may mean a very tight screw (unless you bottomed it out while attempting to vibrate it out). Vibration without a way to induce counter-rotation probably will not work. If you can get the fragment loose, your chances of success are good.
I have modified a "Munce endodontic latch bur" to a flat screwdriver blade because of the longer length and you may need something like that with good magnification (microscope) and illumination to engage a slot that you need to carefully make at the top of the broken fragment. I know it is easier said than done.
Good luck!
michael johnson dds, ms
11/21/2018
nobel biocare has a great screw removal tool. It is a reverse action latch tip that fits into a handle and you use it like a screwdriver except going the reverse way. Be very careful with rotary instruments inside an implant. As soon as you ding up the threads your're done. Another option is to try and screw the fragment IN as much as you can then get a new screw and shorten the tip of the new screw. Providing there's a few threads available inside the implant for the new screw to engage, the shortened screw should work fine (I've had to do this a couple of times myself). Best of luck!
OsseoNews
11/21/2018
All of the above recommendations are excellent. We also sell a Fractured Screw Removal Kit, which is designed for this type of situation, assuming your implant is 3.5mm diameter or greater (it will not work with a narrow diameter implant). The Kit comes with reverse threaded drill and tap, to both create a dimple into the screw and then remove the screw. It also comes with guides to protect the implant body during the removal process, and also help with positioning. You may need a special guide, depending on the 3i system you are using. You can get more information here. Of course, full disclosure is in order: We sell this kit.
Ken A
11/21/2018
Thanks to all of you for the great comments and suggestions. I will continue with all of these attempts and I will look into the kit if nothing else succeeds. Great forum here. I read it all the time.
Dr. Moe
11/21/2018
Agreed with Dr. Ordonez and Dr. Hunt, and others as well. This is going to be long and painstakingly slow process. I have backed out about 10 screws from different implant systems that have been broken, but most of the time the screw was way more coronal.
I have tried slow speed handpiece with very fine tip and I have also used Very, very fine Piezo tip and backed out some but usually by putting a counter clockwise push on to the screw. This is going to take easily 1 hour maybe a couple if you and the patient are really committed to doing this. Especially, since it might be torqued. Good luck because if you back this out, it is going to be a great rewarding feeling. Gotta be careful of the internal threads though.
Good luck and let us know how it goes.
Ken A
11/21/2018
Thanks for the comment, I'm wondering that it has taken you an hour or two. Are you running a slow speed for an extended period in reverse to get it out. Do you have to run a burr for a long time for it to finally work. I assume you would fill the slot with fluid to prevent heat. Is there a particular lubricant that you have had success with? I've heard of ultrasonic tartar and stain remover. Once again, thank you all for the help with this challenge.
Dr. Moe
11/21/2018
Ken,
No, you have to try short bursts in trying to back it out with slow speed in reverse. The reason being, since you will not have any place on the screw to attach to, the handpiece will jump, so you have to be really careful, jumping causes internal thread damage. You will need something like #557. Alternatively, I have used a Fissurotomy bur because they tend to be Cones and so you can feel a little more comfortable but they jump too because you are placing a lot of force on the cone. Size 2 round surgical burs are good too.
First, you will have to see how much kick back you get when you hit the rheostat pedal. So, short bursts at first. Lower RPMs are better in this case. We need torque, not speed. Short bursts also do not create much heat. Check the bur when you take it out by holding it in your fingers, should not be hot. Use can use water from air/water syringe and suction to keep the temp low.
I have never used a lubricant.
Piezotip for removal of broken Endo files is good too because it sends vibrations through and then when you put a counter clockwise force, it can get the screw to spin, very, very slowly. Those tips are fragile. Again, though, slow and steady trying. You are going to have a lot of frustrating fits and starts but that's what it's going to be.
I had to back out 4 broken screws on a hybrid once. 2 popped out within 30 mins, I was able to back them out with explorer tine once they were rotating. I felt Great, Like "Superman" but that only lasted 5 min. It took me 2 appointments to get the other two out, but my patient didn't have any other solution. His dentist had given up and given him the things he bought from Nobel to bring to anyone who wants to try to back those screws, and he was walking around without mandibular prosthesis for 6 months. I had him sign off that I might destroy the interior of the implant in trying to do this and he might need to have it explanted and re-done. We were basically at, this is totally screwed as is, we might as well try it. Last resort.
It worked but wasn't without me thinking several times in my head, this might not work and we are both trying a fool's errand. Good luck, hope this helps.
David Sabourin dds
11/21/2018
Please call Charlie Mastrovich DDS before you pick up a handpiece and try to drill it out. Charlie has spent the last 15 + years doing implant salvage and screw removal for many of the big name manufacturer's. The mistake is trying to drill it out without a drill centering sleeve custom made for the implant. Once you touch the threads with a drill or even a piezo and damage the threads you WILL be stuck with making a post and core and having that fail in short order. Most of these problems are a mismatch between implant/screw diameter and occlusal forces. Call Charlie at his practice in Escondido California. 760-741-6650
Dr Dale Gerke, BDS, BScDe
11/21/2018
I have successfully used either the Astra or Nobel screw removal drill (as Dr Johnson mentioned).
It is end “actioned” with minimal chance of damaging the internal implant thread.
It is cheap (about $60) and easy and generally takes about 2 minutes to get the broken screw out.
It is best to use a reduction handpiece but if you do not have one then use a slow speed handpiece set on the slowest revs possible (or better borrow a reduction handpiece from a colleague). Obviously use reverse direction.
As has been mentioned, there are a multitude of other methods to try but my sincere advice is the try either of these drills first (they both work equally as well). They have worked every time for me – to my pleasant surprise – given how cheap and simple the system is.
Life is not easy sometimes, but no need to make harder than it needs to be. Most mentioned methods may work but they take time and the risk-reward ratio is not as good as these simple drills.
DrDan
11/21/2018
I think most implant companies have a broken screw removal kit, specific to your implant, that they will loan you. I have done that in the past. Call them and see if they have that available.
Dr.Diya
11/21/2018
Hello.
I recommend using a small tip carbide burr(Kerr 330). Use it at low speed contra-angle. Use an adapter so u can fit the FG burr to the contra-angle. If your lucky u will unscrew it. If u don't find that adapter just use the high speed in counter wise hand movement and decrease the speed as much as possible.
You should have a steady hand not to touch implants interior texture. It should unscrew in this way. If screw piece is very tight u can pierce it all the way through ull have a big chance to remove it by ultrasonic tip counter clock wise movements.
I wish u the best of luck. And it worked with me previously .
Dan Fishel
11/21/2018
Think about the last sentence of Dennis Flanagan’s post above! Unless your slow speed burr being run in reverse is EXACTLY in the middle of the axis of rotation of that broken screw, you will actually tighten the screw. Try putting an end-cutting carbide burr in your slow speed and make sure you’re going in forward with that handpiece. Do short counterclockwise rotations with your wrist. I’ve had much better luck that way...
Henry Levant
11/21/2018
3i make a "Fractured Screw Removal Kit" for all their implants that I have used successfully. Either buy it or borrow it and DON"T take ANY rotary or Ultrasonic instrument(s) inside the screw channel unless you have the centering component that is made for that specific implant!
Dr. Bill Woods
12/3/2018
They stopped making the tool when they sold it to Zimmer. I had a broken screw and spent hours trying my best. We agreed on a cast abutment to cement and so far so good. I’m holding my breath but like it was said earlier once the threads are violated it is a different ball game. Great advice from the experienced ones! Thank you!!
Sam latif
11/21/2018
I have had seen this in my practice , tried every thing was suggested here,
The only solution cut few threads from the new screw and try if you can torque the crown ,if not add cement and pray , if all else fails remove it with piezo electric.
Good luck
Dr. Moe
11/21/2018
Ken,
By all means, I strongly recommend using a screw retrieval kit from the implant manufacturer. I was just sharing my experience. I would not tell you to play cowboy, I mean, if you are at your wits end and are going to explant, then you could try my approach.
I do agree with other docs here, try your best with the kits first.
Good luck!!!
Richard Hughes, DDS, HFAA
11/21/2018
Dr Flanagan and others are spot on. I use an ultrasonic scaler and a 557 latch burr in recede.
Ghizi
5/10/2019
I need hints what is the best ways to unscrew a very tight a healing cup from implant
Zev Kaufman, DDS
11/21/2018
Sometimes thinking like a dentist will just get you in trouble and waste your and your patient's time. If you tried removing the screw and have already spent an hour or even more, stop! You have an implant that is placed a bit too coronal for a proper running room, in addition it is too thin for the space. The 3i NT is a very easily and readily removable implant. Take the implant out. Use an implant mount and a hand ratchet In Reverse and it will come out easily. Use a final size drill for a Straumann tissue level WN implant and place a WN 4.8x8 implant instead of this damaged one. You do not even need to open a slap. If you have never done a similar procedure, ask your local more experienced surgeon to do this for you. The whole process should take no more then 15 minutes to half an hour. Within two months you will have a much better quality implant in a better position and you would have spent a lot less time fooling around and causing your patient greif. Just remember: the complexity of the procedure does not necessarily enhance the value of the result. Oftentimes most expedient and better solution is to scrap the failure and start anew with better equipment and hindsight.
Paul
11/21/2018
One more suggestion in the pool of many. One has to create tools to deal with the problem that perhaps is not covered by all the surgical kits. If you acquire a few, you may have to part with a great deal of money and even than not be successful. My suggestion is to use a small round bur and get the bur (obviously in a handpiece) into the tapped implant until it touches the screw so that it would not damage the thread of the implant. At the point of resistance activate the handpiece with full awareness of what the goal is. Create a slot like in a screw and with a small instrument like a chisel (fabricated or ready made) attempt to unscrew the broken screw. Many times abandoning the tine end of screw may not effect the retention of the abutment with a new screw that can be shortened to meet the modified condition. It beats the alternative. Perhaps one could practice on an old screw and see what it takes to create slot in it. In the mechanical world many times custom tools are fabricated to deal with all kinds of problems. After cutting a screw on has to check its function on a failed implant. That's what failed implants are good for.
JRamos
11/22/2018
Leave the fractured portion , use the Z series screw buy Southern Implants . They are shorter !
Matthew DMD
11/22/2018
Although this appears broken pretty far into implant, I have great luck using a cotton tip applicator or even a small cotton pellet placed onto the screw. Once you are seated on the screw just continue to turn it counter clockwise. The cotton willl engage any sharp area and work the screw out. It is not an ultra fast procedure but has worked very well with no risk of implant damage.
Charlie Mastrovich , DDS
11/22/2018
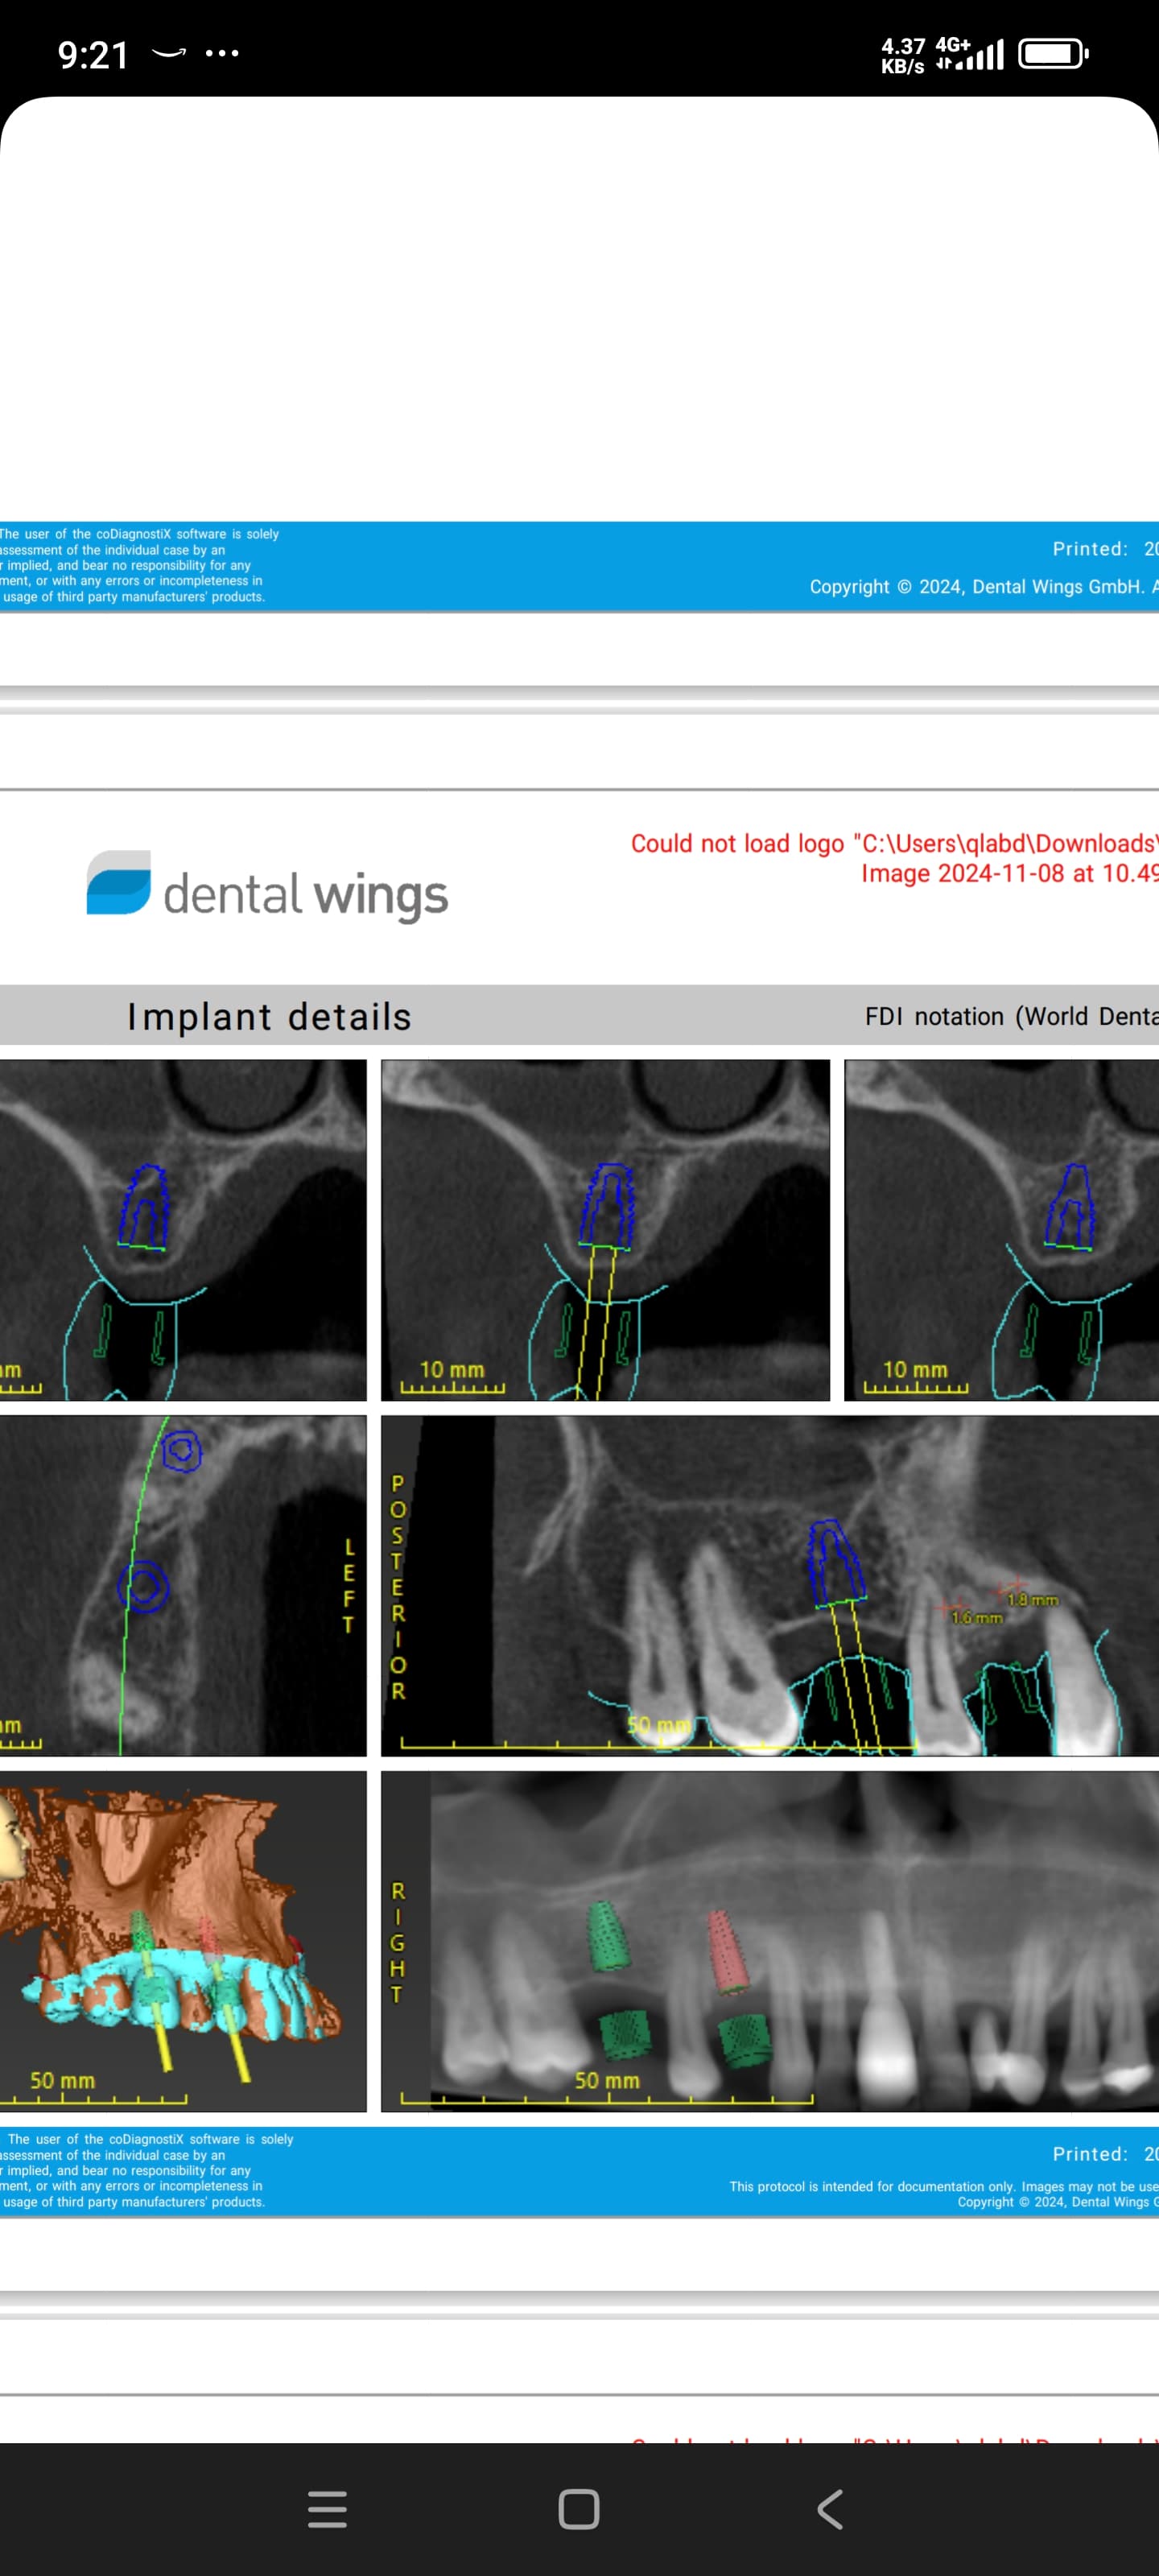
If the radiograph you posted was taken post efforts with the plastic sleeve and a reverse round bur I suspect you already have thread damage in the top or possibly two threads. If so, the fragment will be locked and impossible to remove conventionally with instruments or strategies designed to retrieve mobile fragments. (Most of the strategies listed above. ) Here's how I'd progress at this point.
1) evaluate what's left. Is the implant restorable and worth the effort if the remaining threads are cleared? You're asking "how" to recover. I maintain you must also try to understand "why" did it fail. So even if retrieval is successful, you don't end up with another failure in the future. If proceeding with recovery, in addition to looking at it with the scope and a having a very clear radiograph, I often take a poly vinyl impression of the internal aspects of the isolated implant and compare to an opened analog or practice implant. I will not proceed unless I understand the internal dimensions and geometry before proceeding. Remember dimensions are small and the tolerances are tight, so there is little room for error. All implants don't have the same value or downside if the correct choice is to simply explant and replace.
If proceeding:
2. If the implant lead thread is damaged all is not lost but the retrieval is definitely more complicated. I mobilize every diameter (from M1.6 and bigger ) fragment by centerdrilling to .8mm (.031") and use the hole to guide either an easy out or fragment fork, by hand. If the top thread is damaged more than a slight nick then even this technique will not work which will force a total drill out. This is accomplished by enlarging the initial concentric .8mm hole to the predrill size of the implant threads, which totally removes the shaft of the screw fragment but the residual male threads will be remaining. These are retrieved with taps, by hand, alternating between a modified plug tap and conventional plug tap. At the end, a bottoming tap can confirm the threads to depth. The scope is mandatory to stay on top of this progress.
Currently, I cannot help you with instrumentation at this time as all my instruments are prototypes, custom machined in my own shop. But stay tuned, as this will be changing. However, you can download a handout off my website at mastrovich dental.com, under the IMR area (implant mechanical rescue). This explains the algorithm of screw retrieval. I wrote this for Seattle AO meeting about 4-5 years ago and is currently being updated as a guide for retrieving screw fragments and also fractured abutment fragments as it will be used in a course presented at the midwinter meeting in Chicago.
If I can help clearify some of the concepts I presented your welcome to contact my office. The number was posted previously by Dr. Dave Sabourin above.
Charlie Mastrovich, DDS
Robert J. Miller
11/23/2018
The shorter the implant screw fragment, and the deeper the screw is in the channel, the more exponentially difficult it becomes to remove. The problem is not mobilizing the remaining part of the screw,. Rather, it is a battle between screwing the fragment through the remaining channel and burring of the threads. I have removed many screws through the years and have found that those screws that fractured because of loosening are the easiest to retrieve. Those screws that fractured because of excessive torque are most difficult to retrieve. And finally, the longer you work to retrieve it, the more likely you are to damage the thread profile, making retrieval impossible. A good microscope is a must to begin with. The I visualize the fragment and put the tip of an explorer onto the coronal part. Then I attempt to slightly turn the screw. If it is even slightly mobile, your success rate goes up dramatically, provided you don't damage any of the threads. If there is no movement then the solution is either placing a shorter screw or replacing the implant. RJM
Jeffrey Kanter
11/24/2018
Many of the manufactures loan a technical screw removal kit. I am familiar with the Straumann (not the 3I) kit, and it includes a tap to refine internal threads if they are damaged. Of course I would never drill internally in any way without a guide sleeve, but if there is thread damage it is not necessarily fatal, and probably easier to repair with a tap than removing and replacing an implant (bone loss, compromised esthetics, amount of surgical exposure, etc.). As with many things we do, best to refer to someone that has significant experience to deal with it rather than diving into waters potentially over your head. Much less stress for doctor and likely better outcomes for patient.
Yoshi
11/24/2018
Usually you can remove fractured screws simply with a dental explorer by rotating the top part of the remaining screw since fractured screw do not have pre-load effect anymore.
Ken A
11/25/2018
Dear Colleagues, I thank you very much for all of your input and advice. I will spend some time digesting all advice given and work through the problem. If my process winds up being of any interest I will post it with the outcome as I think it is very valuable to see how "things wind up".
Thank you again.
Karen
11/29/2018
3-I have a screw retrieval kit, contact your rep. they will lend it out.
Ken A
11/30/2018
Thank you Karen, that will be my first move.
RB
12/11/2018
What is the reason for this screw fracture? how could it be avoided?
Brian
2/18/2019
From the radiograph, it looks like the broken portion is the threaded part of the screw and it's occupying most of the threads, maybe the top thread is exposed. The area above it is occupied by the abutment, most of which is round. The anti-rotational hex is near the platform.
I wouldn't say, go banging around in there, but how much danger is there, really, of damaging the threads in the case? I'd think there's even less risk of damaging the hex. And if the internal surface of the implant facing the non-engaging portion of the abutment is altered/damaged, why would that matter at all?
If the screw can't be removed, I'd say, there's really no chance of cutting another screw short and using it to retain an abutment given there's maybe one thread available to engage.
And given that, although we call it a screw, it is actually a bolt, how could it be torqued into place unless it's misthreaded and then maybe those threads are already ruined?

