Patient Would Like to Avoid a Lateral Wall Sinus Lift: Advice for this Case?

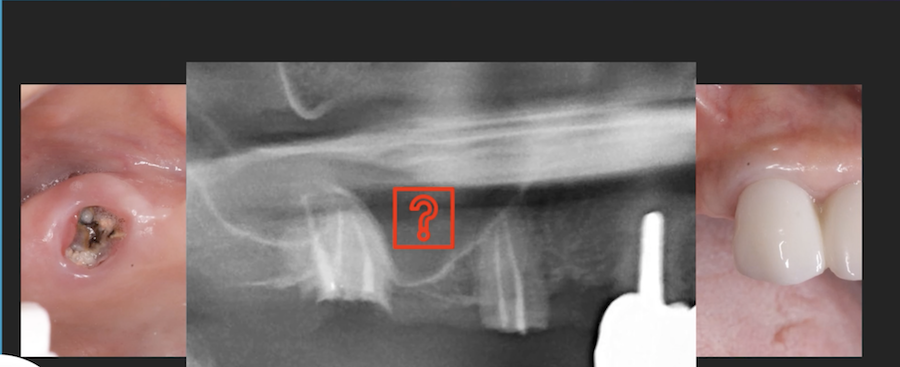
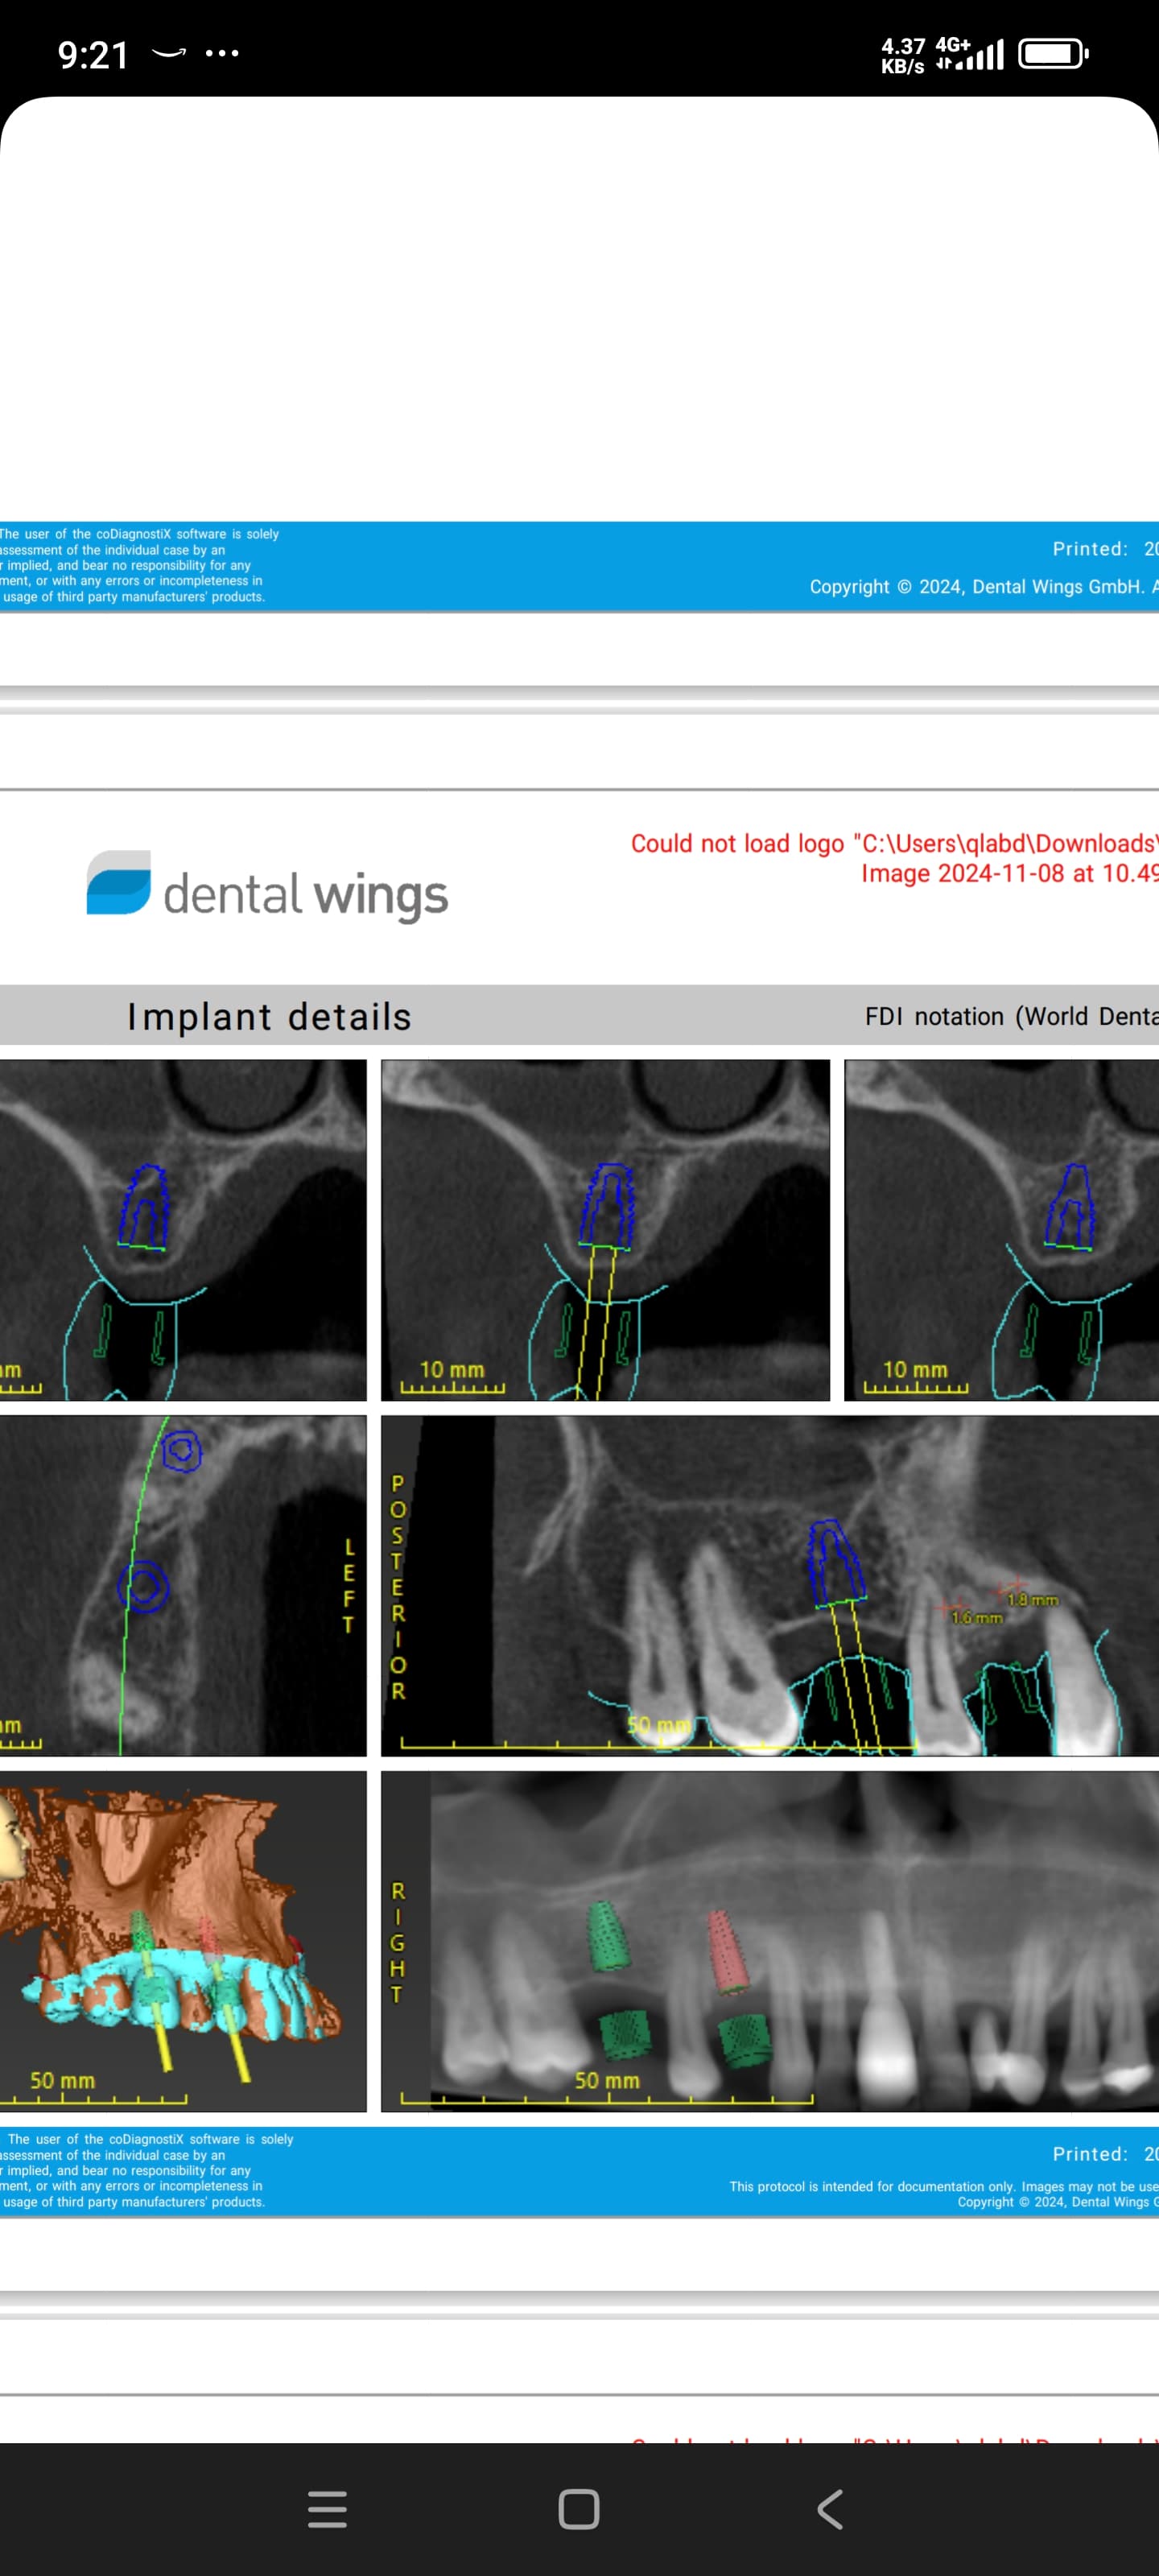
I have a patient who I have treatment planned for placing implants in #4 [maxillary right second premolar ];15] and #12 [maxillary left first premolar;24]. Â Can I accomplish both of these with a Summer’s lift? Â I would like to use 10mm length implants. Â My patient would like to avoid a surgical lateral wall sinus lift. What procedure do you recommend here? Also, for #4 site, is there a problem with the thickened sinus lining that is present (patient doesn’t have any symptoms of sinusitis past or present)? I would appreciate advice on this case before I proceed. Please note that I’m a beginner at implant placement. Thanks for any comments.

(click on images for larger case photos)


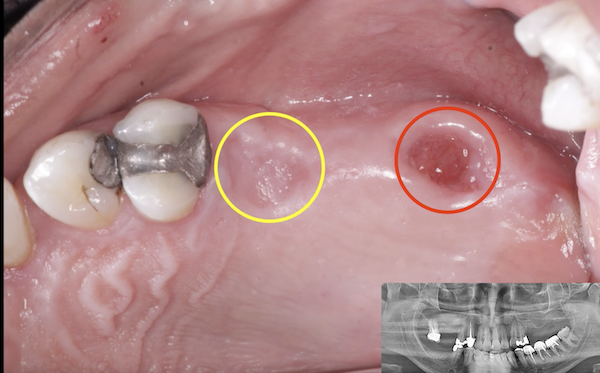
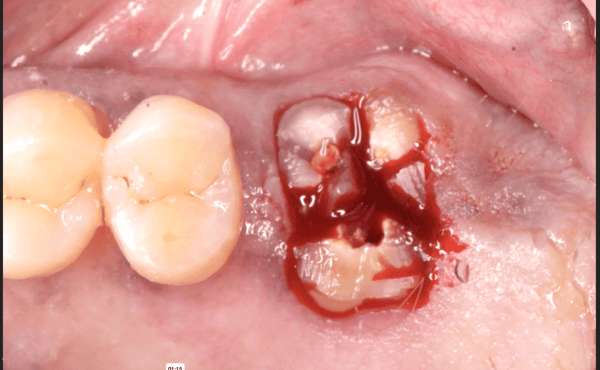
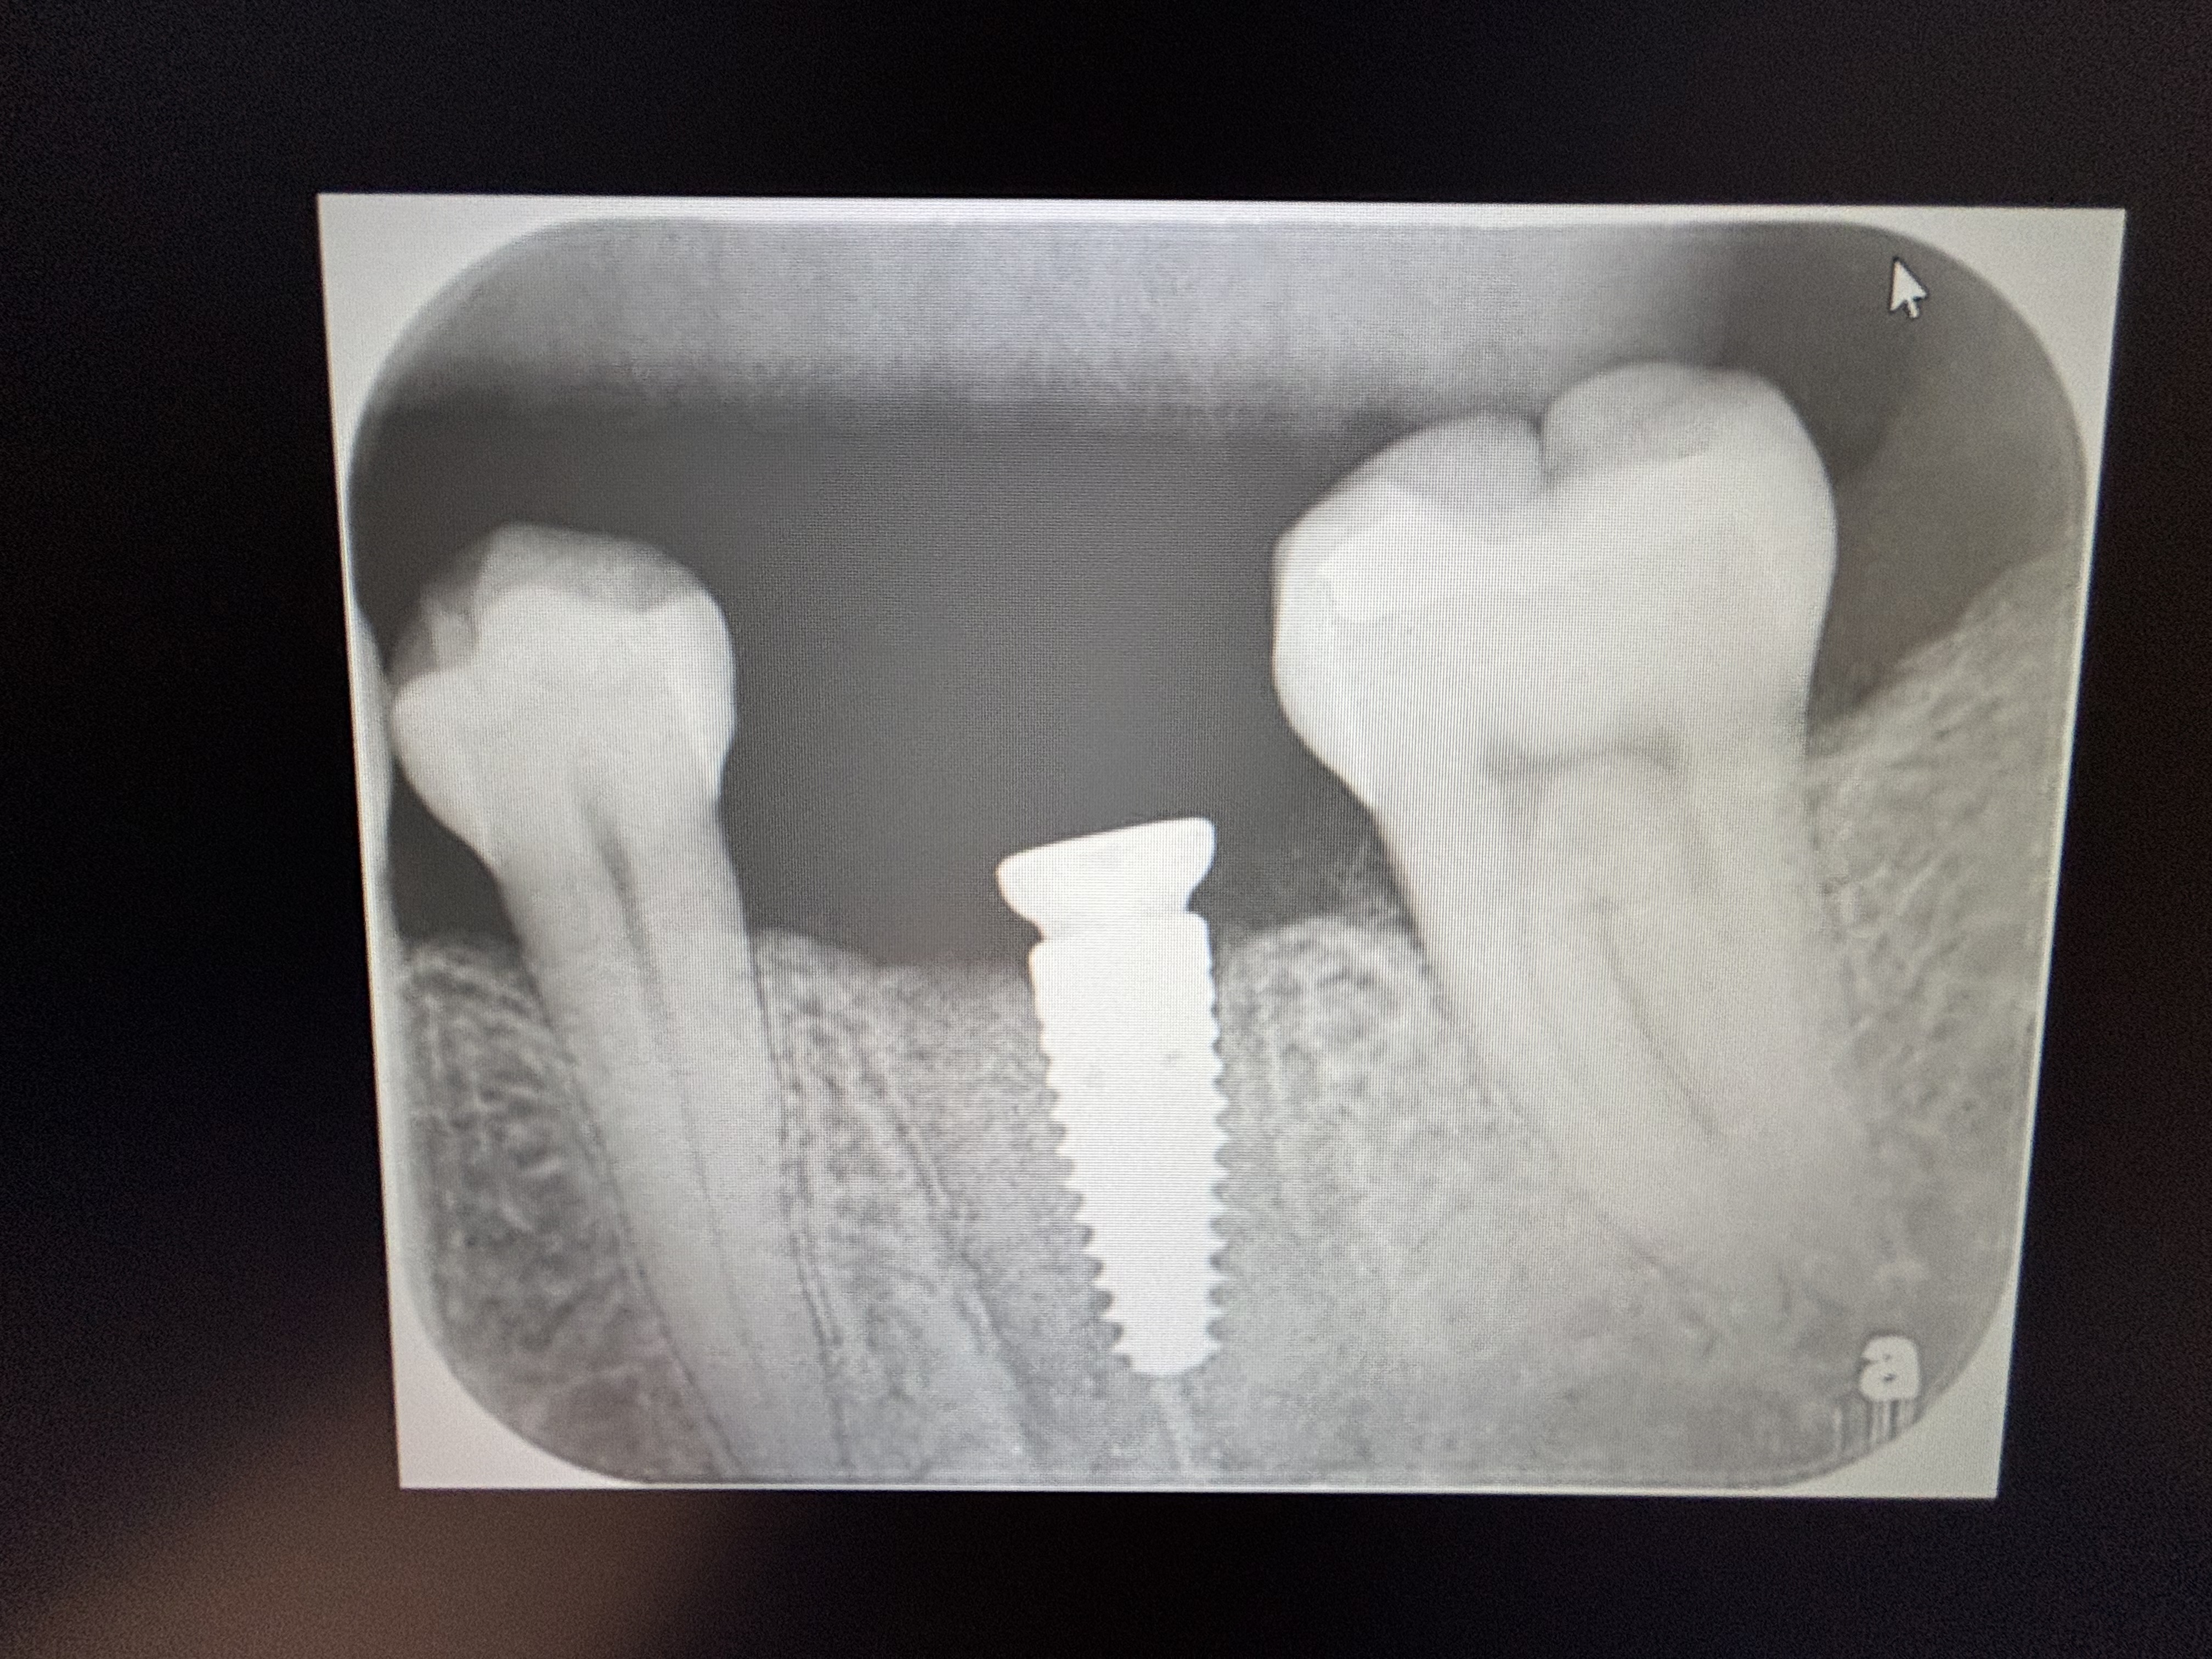
![]15 (upper right second premolar) site](https://osseonews.nyc3.cdn.digitaloceanspaces.com/wp-content/uploads/2012/07/15-1-e1343648059273.jpg)15 (upper right second premolar) site
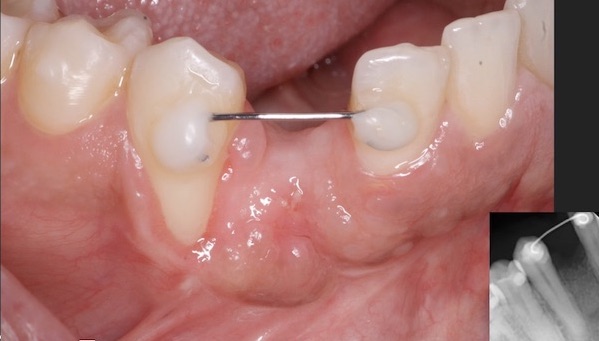
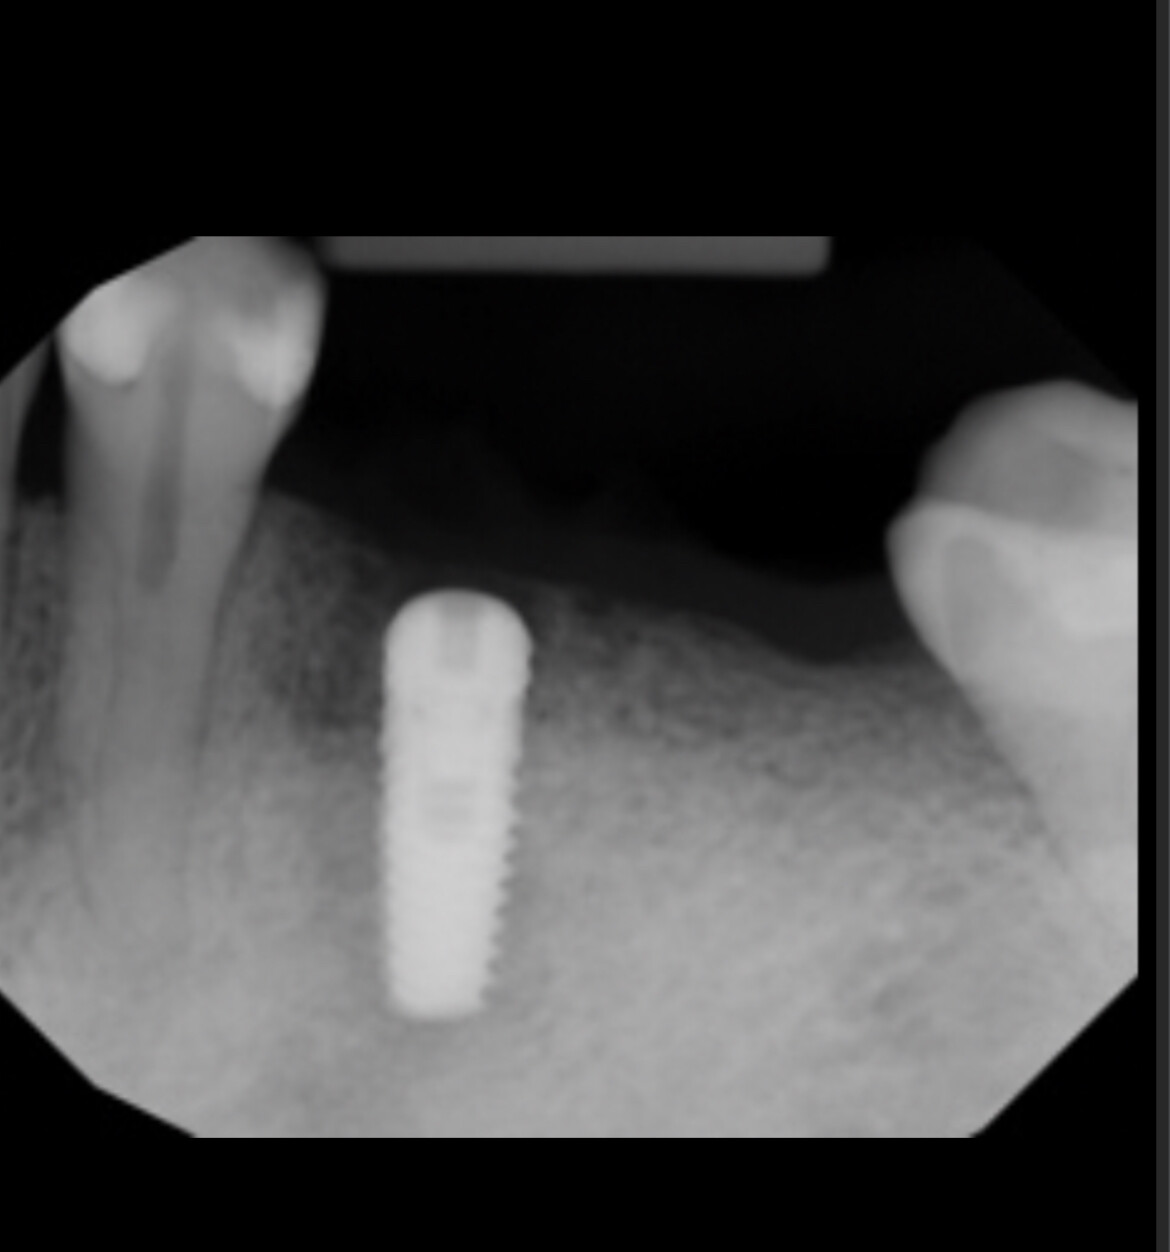
![]24 (upper left 1st premolar) site](https://osseonews.nyc3.cdn.digitaloceanspaces.com/wp-content/uploads/2012/07/24-1-e1343648000911.jpg)24 (upper left 1st premolar) site

42 Comments on Patient Would Like to Avoid a Lateral Wall Sinus Lift: Advice for this Case?

New comments are currently closed for this post.
Irbad Chowdhury DMD
7/30/2012
There are crestal approach sinus tenting kits available out there. They tend to be technique sensitive. Personally, I would do the lateral window approach. It has been proven to be quite successfull with immediate placement.
Guy Carnazza DMD
7/30/2012
You may want to consult an ENT regarding the right sinus. Appears to be some thickening of the mebrane.
Baker k. Vinci
8/1/2012
Exactly guy. An ENT to asses the patient prior to a dental procedure. How bout using one of your OMFS colleagues . I agree however with the resident! You have this technology, use it. Any scanner can give you accurate readings and measurements that can be double checked, during the procedure. The patient needs to know that the risk if sinus perforation is higher with the blind technique, especially when done by the neophyte. Bvinci Vinci Oral and Facial Surgery. Baton Rouge, La
Guy Carnazza DMD
7/30/2012
Left side should take a pa with 5mm steel ball marker and measure from crest to base of sinus. Looks as if you can avoid a lift altogether on the left side.
OMS resident
7/31/2012
Or even easier, just use the measurement tools in the scan software...
Dr.Alex Zavyalov
7/30/2012
Very good diagnostic images, showing one more left-side problem: the angle of the ridge is not favorable for an axis loading and custom-made abutment is the only choice.
Dr Chan
7/30/2012
If you are a beginner, try to get more experience under your belt before attempting something as technique sensitive as sinus lift. Just as well you do not need to do a sinus lift in this patient. The posterior support is good. Assuming the slice thickness of your CBCT (resolution) is 1 mm, the sinus floor is 7mm thick on the right and 10 mm thick on the left. You can get away with a short implant on the right and thus obviating the need for a SFE. You can place a 10mm implant on the left after ridge splitting. Try to place it as parallel to the long axis of the teeth as possible (as mentioned by Alex). The roots of the adjacent teeth are convergent and great care must be taken to avoid them. You have 5 mm apically at site 15 and 6 mm apically at site 24. This, and the sinus floor thickness will limit the choice of implants used. Do you really want to complicate the case with a SFE?
Baker k. Vinci
8/1/2012
So, let me understand, dr. Chan . You are suggesting more experience before the sinus lift, but advocate a ridge split procedure in stead . Having done greater than 1000 ramus osteotomies, I can tell you that Osseus splitting is a significantly greater task and the complications associated with that procedure are much greater than a failed sinus lift. Bv
Dr Chan
8/1/2012
BV, you are comparing a mountain with a molehill. Ridge-splitting (expansion) in this case is a simple localized dento-alveolar manipulation in the maxilla. If you have to choose, would you be happy to let Dr Yong performing a sinus lift or ridge-splitting on yourself? :D David
Baker k. Vinci
8/1/2012
A sinus lift any day. If he perforates the sinus, he closes the wound. If he fractures off the buccal plate of an adjacent tooth, then I'm screwed. Bv
a yong
7/30/2012
Hi all. Thanks for replies and suggestions. Dr Chan, without doing an internal sinus lift, is it possible to drill osteotomy through sinus floor cortical plate, so implant will get bicortical stabilisation, and have the implant apex protrude 2mm into the sinus?
greg steiner
7/31/2012
My histology of the sinus floor shows no cortical plate and no cortical bone. The reason you see greater density on the radiograph is because you do not have open trabeculae. So the sinus floor is just a thin layer of bone the thickness of the surrounding trabeculae.
Joseph Kim, DDS
7/31/2012
A short implant would be fine here, but the length of the fixture will depend on the design. Assuming it is 7 mm to the floor, then for internal hex, trilobe, etc, without significant platform switching, you can place an 8 mm fixture and place it flush with the crest. If you are using a platform that is significantly platform shifted, such as Aastra, Bicon, HiOssen, etc, then you must place it subcrestally, and use a 7 mm fixture. In regards to using a crestal approach kit, I own one (donated by a company to me), and while it is useful, it takes too long and it is too expensive for the occasional user (about $2500). Below are the techniques that I use to do small to large, crestal approach sinus lifts. Using the Summers technique, or using the implant as the infracture device, you can safely get 2 mm of "lift." Using a kit, the the technique I describe below, I have achieved lifts of over 10 mm, while paying less than $50 for the equipment. 1) expose bone 2) drill up to 2 mm diameter just until you feel resistance at the sinus floor 3) undersize your drills; for 3.75 mm diameter fixture use a 3.25 drill, AND do not drill to full depth! Drill about halfway to 2/3 down. 4) place fixture; if the first thread will not bite, then use the next drill up, but only through the cortical plate; advancing your fixture when the apical portion in tightly in the bone, will AUTOMATICALLY infracture the floor to the distance you need, so long as it is not more than a couple mm. 5) If you want to attempt an internal lift, then use a 2 mm diameter osteotome, with a screw adjustment and blunt or rounded tip; once the drill has hit the floor of the sinus, place the osteotome into the osteotomy and advance the screw stop until it is in contact with bone. 6) Remove the osteotome and measure the length, then ADD 1 mm to it. 7) Attempt to advance the osteotome to the new full length (if the depth to the floor was 7 mm, then the osteotome will be pushed to 8 mm); if it goes to full depth, add another mm to the length and try it in again, if it meets significant resistance, then push it in to the new depth, and check again; if it doesn't meet resistance, stop and perform valsalva maneuver to ensure integrity of Schneiderian membrane. 7a) If osteotome will not advance despite heavy force, then, use mallet to gently tap the osteotome to depth, and repeat steps above. 7b) Alternatively, and for patients who will not tolerate malleting, use a #6 or #8 round diamond bur on your latch implant handpiece; with 2 hands, erode the floor of the sinus by 0.5 to 1 mm; perform checks mentioned above; repeat until a DROP is felt or osteotome can be advanced 1 mm without resistance; this is technique sensitive without the use of stoppers for the drill; if valsalva maneuver reveals perforation, place collagen tape into osteotomy and suture to primary closure; reenter in 6-8 weeks, but it is much easier then, due to incomplete bone healing. 8) Place any graft material into the osteotomy with an amalgam plugger, and push the osteotome to depth. Repeat until desired height is achieved radiographically (PA), or you feel it is high enough from experience. 9) Perform undersized final osteotomy. 10) Place implant; suture Having said all of the above, perforating through the floor should not be a big problem, so long as you don't try to place an implant such that half of it is hanging out in midair. While there isn't any strict contraindication to such, as long as you avoid creating mucus traps within the sinus, it is poor form. Perforations of up to 3 mm on dogs seem to be fine in the literature, and in the private practices of most clinicians I know. However, beware of smokers, and make sure the all perfs are on a potent antibiotic, as well as, sinus protocol. God bless your journey as a skilled clinician.
a yong
8/1/2012
Hi Dr. Kim - thanks for such detailed explanation. You mention about platform switching affecting the depth at which you place an implant - I do not really understand your reasoning why. Can you explain a little more to me?
Baker k. Vinci
8/2/2012
It is acceptable to go into the sinus a couple of mm and important , in my opinion to engage that bit of cortical bone. A lot of surgeons still go by the 13mm rule, as being the shortest fixture you would place in soft maxillary bone, but a shorter, 5-6mm wide fixture seems to work quite nicely. I know you don't have that luxury in this case, so I feel like the patient would be best served with a 15-16 mm implant, with a traditional lift . Some patients will change their minds, if the procedure is explained appropriately . Good luck! Bv. Vinci Oral and Facial Surgery. Baton Rouge. La.
Richard Hughes, DDS, FAAI
7/31/2012
This is a good beginner case for the Summers lift. Learn the technique and proceed.
Mario K Garcia,DDS
7/31/2012
Hello Doctor; As I evaluate your case; I would probably recommend to treat case with a nice fixed brigde on both sides. Why? in both side the anterior and posterior abutment are compromised ( in addition to the sinus issue on the right side). Providing these abutment with full coverage and a pontic in the middle would be the simplest, most effective and least invasive way to go. Thank you for sharing this case with us.
rsdds
8/1/2012
come on dr. garcia why would you sacrifice 4 teeth ?
Baker k. Vinci
8/2/2012
So cut down two healthy teeth and place a pontic in a patient that has already proven they have trouble with oh.. I suggest "that" is more invasive than an implant and in the long run, more cost effective and easier to clean. Have you not woken up from the days of old G V B? All in good fun! Bv
DrGus
7/31/2012
Hi! I agree with Dr. Hughes, is a simple case for a summers technique or for a digital set of elevators. Read, learn and proceed! Is not that complicated. Enjoy!
greg steiner
7/31/2012
Smart patient. If you want to have the benefits of a lateral sinus lift without the trauma and potential complications Google the Steiner Sinus Lift. Greg Steiner Steiner Laboratories
PhD. BOJI SAAD
7/31/2012
you can do very easy sinus elevation with CAS kit of osstem i mean crystal approach ,its so nice and simple
John Manuel, DDS
7/31/2012
A Yong, great records! From the limited info, it looks like you could place Bicon Short Implants in these sites with ease while avoiding a major sinus lift. They work well with the internal lift procedure if you wanted to do that. A 5.0 x 6.0 mm or a 4.5 x 6.0 mm wouod be ideal. If you ran into tighter space upon opening, they have a 4.0 x 5.0, but that would work better in the mandible or only in a maxilla narrow enough to have the cortical plates very close. You have much more room than most cases in that area where it is common to have a buccal plate divot halfway down. Check out the webcasts on Bicon's site. John
Sandeep
7/31/2012
Please try SC kit by neobiotech
Don Rothenberg
7/31/2012
I agree with Dr. Manuel...you could place Bicon 6mm length implants...with internal sinus lift with Synthograft...if necessary. This is very straighten forward...there is NO need to place the longer implants...and the sooner treating dentists understand this the better for our patients. No need for the cost and risk of sinus lifts...and the complications and risks that go along with that procedure. I have been using Bicon's short implants for over 20+ years (8mm or less) with great success.
Don
7/31/2012
Wow! How dentistry has changed. The posts are falling over themselves to get their push for implants. The only post that makes sense is the one by Mario Garcia. Implants have become the "Holy Grail" in Dentistry. The evidence is right in front of you. Possible abutments on both sides are compromised and need restoration---use them to support three unit fixed bridges. you will have to restore these teeth anyway if you place implants in the edentulous areas, as is being suggested,so why not, instead, add a pontic to fill the edentulous area and restore the mouth to full function. --At a fraction of the cost. PS. to Garcia---Glad to see that someone recalls his basic training and has not become another Implant Specialist.
Ed Feins
7/31/2012
These images are great. No scatter. Please tell me what machine took these?
a yong
8/1/2012
Ed, it was taken by Planmeca ProMax
byu
7/31/2012
I've used Anyridge implants for similar cases like this with great success. Using the low speed/high torque technique, you will be able to extend your implants at least 2 mm into the sinus without any problem.
kamal
7/31/2012
@ don, @ garcia bridge would have been an option if only those teeth were in good health. you obviously have not seen the periodontal status of these teeth. the biomechanics will be royally compromised if a bridge would be done making use of these teeth , where the alveolar bone level is at middle 1/3rd.( specially # 4)
John Manuel, DDS
8/1/2012
Regarding the mention of various implant brands, most of us have no ties to manufacturers, but want to share our experiences in a brief, concise manner so the viewers can easily know where to go for the devices and techniques. For example, I could list a detailed procedure like Dr. Kim , which is fine and helpful, or I could recommend Dr. Yong view the free webcasts showing sinus lifts on the Bicon site. I do not care what brand or design he chooses, but I think an up to date surgeon should consider all the workable options, including some short implant designs. John
dr. bob
8/1/2012
Mario Good call, treat the patient not juat the edentulous space!
John Manuel, DDS
8/1/2012
Also, Dr Yong, The benefit of platform switching comes from allowing greater room for bone and tissue circulation in the constricted area where the implant and abutment meet. Also, the greater implant body submergence, under the crest in some instances, allows more vertical space to more smoothly adapt the final crown emergence profile to the implant body position, i.e., to more easily compensate for implant size, position, and angulation discrepancies. For example, where a wide implant emerges thru a thin cortical plate, there is little supporting medullary bone to maintain that thin plate, so it goes away. If the same width implant emergence stops below that thin cortical plate and a narrower abutment performs the emergence, more supporting subsurface circulation is present towels maintain the hard and soft tissues where the abutment emerges. There ate many different designs to help achieve this.
Dr. dan
8/1/2012
UL appears to have a narrow space, but I think a tapered implant with a regular diameter platform should do. From what i can see in these CT scans, I see no problem even considering shorter implants. In my experience, the slight thickening of the schneiderian membrane doesn't look like a big deal.
james butler
8/1/2012
Bicon 4x5 two stage approach. great success in these situations. simple restorative components and high strength after integration. good luck whatever you choose, it is what works in your hands that counts.
a yong
8/2/2012
For the internal lift drills to lift up the sinus membrane, is convex tip or concave tip better?
dr.p
8/2/2012
dear doc, i do think there is enough bone for indirect sinus lift,but dont forget to do ridge split and also stop ur drills short of 2mm from sinus and do the sinus lift with osteotomes and simultaneously condense the bone.
John Manuel, DDS
8/2/2012
Dr Yong, whatever brand and style of implant you are using, the manufacturer probably can show you detailed steps for proper sinus lift with that particular design. It's not a good idea to drill into the sinus as a means of lifting the membrane. Usually, a short drill prep is done short of sinus entry, and then a bugle shaped peristome is used to fracture the floor, followed by undersized expansion plugs with graft material to gently lift the membrane before the final implant placement. As for the need of 8-13 mm long implants in the maxilla, note that the length needed varies with the design and active bone interface surface area. A six mm long, finned Bicon implant has as much or more surface area as an 8-11 mm long threaded implant. The advisable length and width will vary per the brand and design of the implant. One cannot simply say a certain length/width is required of any brand.
Eduardo Morales
8/5/2012
Under my own experience, i think that the easiest way to treat your patient is with the INTRA LIFT technique using PIEZOTOME and also because that is a flapless procedure. The results are so very confortable and with a minimum swallow.
Eduardo Morales
8/5/2012
I also wat to congratulate for your study, all the images you sended help to take the right procedure,
CRS
8/7/2012
Great indication for a Summers lift, a first molar site in a maxilla does well with a longer implant since the bone is more porous. I concur, nice discussion. It is difficult with a 7mm lateral wall to scoop down and lift the membrane from the lateral approach.
kamala kannan r
8/11/2012
best option in this case would be using a laterally loaded Basal implant,BOI, rather than routinely used axially loaded implants. u can use these basal implants where the remaining bone height is less than 5mm in 24 and 14 regions.Absolutely no sinus lift is required in this case when u use this implant system.

Featured Products

OsteoGen Bone Grafting Plug
Combines bone graft with a collagen plug to yield the easiest and most affordable way to clinically deliver bone graft for socket preservation.
CevOss Bovine Bone Graft
Make the switch to a better xenograft! High volume of interconnected pores promotes new bone. Substantially equivalent to BioOss and NuOss.